10 Anime Face Painting Lesson
Anime Face Painting: Drawing an Older Male Character – Welcome to this detailed tutorial on drawing an anime or manga-style face for an older male character. In this guide, we’ll cover the essential steps and measurements to create a sophisticated and realistic anime face, focusing on a man in his 30s or 40s. This character will have defined facial features and a muscular build, exemplifying the complexity and depth of adult anime characters.
Step 1: Draw the Head Shape
Begin by sketching the overall shape of the head. For a front view, the top of the head should resemble a circle, transitioning to an oval in the side view. Older male characters typically have elongated faces compared to the rounder faces of younger characters.
- Front View: Draw two vertical lines descending from the top circle, angling inward to form a broad chin. This gives the character an aged appearance.
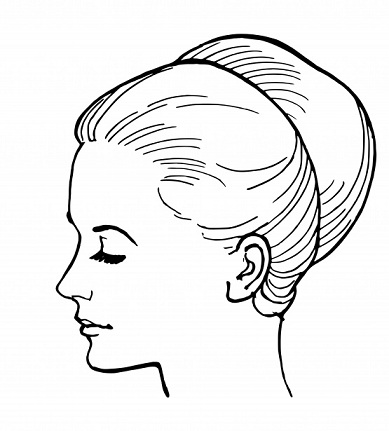
- Side View: Outline the lower part of the face, focusing on the contours without detailing the nose and mouth. Avoid straight lines; instead, suggest the natural curve from the nose to the chin.
Step 2: Position and Draw Eyes
Establish the eye placement by drawing a horizontal line across the middle of the face. For older characters, eyes are positioned closer to realistic proportions.
- Front View: Maintain a one-eye-width distance between the eyes. This spacing helps achieve realism in older characters.
Step 3: Place and Draw Eyebrows
Before drawing the eyebrows, determine where the hairline will fall, slightly below the top of the head. Divide the face into three equal segments from the hairline.
- Draw the eyebrows along the line below the hairline.
Step 4: Draw the Ears
Position the ears within the middle section of the three divisions you created earlier. This placement aligns with realistic anatomy.
Step 5: Draw the Nose
Sketch the nose with a tip near the bottom line of the middle section. Unlike typical anime noses represented by a simple line, this character’s nose should have more definition.
- Draw the tip and one side of the nose to add dimension.
Step 6: Draw the Mouth
Position the mouth by placing the lower lip between the bottom of the nose and the chin, with the upper lip slightly above.
Step 7: Draw the Hair
For a mature look, draw the hair starting from the hairline determined earlier. Use small, natural-looking “teeth” in the outline to create a realistic texture.
Step 8: Line Drawing
At this stage, refine and clean your sketch by erasing any unnecessary guidelines. Add small details like wrinkles around the forehead and under the eyes to enhance the character’s age.
- Consider using black ink to outline your drawing for a bold finish.
Step 9: Color
Fill in the large areas with appropriate colors. For paper drawings, leave the eyes white or add highlights digitally if working on a computer.
Step 10: Add Shading
Apply basic shading to enhance depth and realism. Focus on areas typically in shadow:
- Under the chin (casting shadow on the neck)
- Inside the ears
- Beneath the nose (including slight shading on one side)
- Under the lower lip
- Around wrinkles
Conclusion
This tutorial provides a comprehensive approach to drawing an older male anime character. By following these steps, you can achieve a mature and refined anime style, capturing the intricate details of age and personality. Practice these techniques to bring your characters to life with depth and expression. Happy drawing!

mobic cheap – order celecoxib sale flomax 0.2mg brand