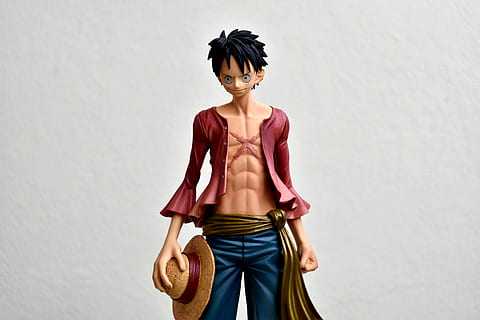
How to Draw Monkey D. Luffy
Monkey D. Luffy Drawing – Use this step-by-step guide to learn how to draw Monkey D. Luffy from the manga and anime series One Piece. Follow along with the video instructions for a complete drawing experience. A new lesson is uploaded weekly, so stay tuned!
Getting Started
Pencil Drawing: Start with light, smooth strokes. Don’t press too hard in the early stages.
Step-by-Step Instructions
Step 1: Draw the Head Circle
Begin with a large circle in the middle of the page to serve as the guide for the upper part of Luffy’s head. This doesn’t need to be perfect, as it’s just a guide.
Step 2: Add the Chin and Jaw
Draw a curved line at the bottom of the circle for the chin and jaw. The line should form a point near the chin’s center.
Step 3: Cross Lines for Facial Features
Draw two intersecting lines across the head—one vertical and one horizontal. Slightly bend the lines to fit the head’s shape.
Step 4: Guide for the Eyes
Add two small circles on the horizontal line for Luffy’s eyes. The right circle should be smaller due to perspective.
Step 5: Draw the Ear
On the left side, draw a C-shaped line for the ear. Position it at the end of the left horizontal line.
Step 6: Outline the Basic Shape
You now have the basic shape of Luffy’s head. Begin refining your drawing by pressing harder with your pencil for darker lines.
Step 7: Define the Eyes
Use the circles as a guide to draw Luffy’s eyes, darkening the top and bottom parts. Add a large dot in each eye for the pupils.
Step 8: Draw the Eyebrows and Nose
Above each eye, draw a curved line for the eyebrows. For the nose, draw a curved line with a sharp tip near the bottom, following the vertical guide.
Step 9: Sketch the Mouth
Draw Luffy’s large open mouth, using the circle’s lower edge as a guide for the upper lip line.
Step 10: Add Teeth and Tongue
Inside the mouth, draw two curved lines for teeth and add a few lines for the tongue.
Step 11: Detail the Ear
Use the C-shaped guide to draw the ear, adding curved lines inside for detail.
Step 12: Begin the Hat and Hair
Draw the upper part of the hat as a long curved line above the eyes, adding spikes for hair under the hat.
Step 13: Add Hair on the Left
Draw long curved spikes on the left to represent Luffy’s shaggy hair coming out from under the hat.
Step 14: Add Hair on the Right
Add similar hair strands to the right side, matching those from step 12.
Step 15: Draw the Neck and Scarf
Use the initial lines to draw the neck and a scarf with small tubes in the lower right corner.
Step 16: Draw the Hat’s Brim
Sketch a long curved line for the brim, adding extra lines for a worn-out look.
Step 17: Complete the Hat
Draw a dome-shaped line for the top of the hat, adding lines for texture.
Step 18: Review Your Drawing
You now have a detailed sketch of Luffy. Choose to stop here for a rough look or proceed to ink it.
Step 19: Ink the Drawing
Carefully outline the drawing with a pen or marker. Once the ink dries, erase the pencil marks for a clean finish.
Step 20: Color the Drawing
Color the hat and belt red, hair black, skin peach (or light brown/yellow-orange), and mouth sides brown with a pink tongue.
Now you have a complete drawing of Monkey D. Luffy from One Piece!
Thanks for Visiting Our Website – Easy Anime Drawings


provigil 100mg uk order provigil sale order provigil 100mg pills buy modafinil generic order modafinil 200mg pills generic modafinil 100mg order modafinil 100mg