How to Draw a Candy Apple Step by Step
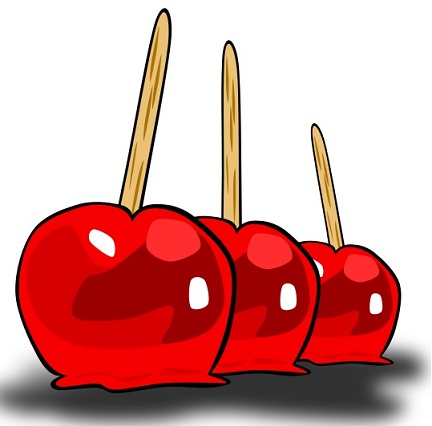
Draw a Candy Apple – This tutorial offers a detailed guide on drawing a candy apple in eight steps, incorporating line drawing, color examples, shading techniques, and quick tips. Candy apples are a popular treat often appearing in anime and manga, especially during festival scenes. This example is presented in a cel-shaded style typical of anime, which does not use gradients for shading. When drawing on paper, it’s advisable to start with pencil sketches, using light strokes to easily erase construction lines.
Understanding Candy Apples
Candy apples, known for their glossy, colorful coating, are a staple at fairs and festivals. Traditionally, they are apples coated with a sugar or caramel layer, often wrapped in clear plastic. This tutorial will help you capture their shiny, appealing nature in your artwork.
Step-by-Step Instructions
Step 1: Make a Simple Design of the Candy Apple
- Draw Guidelines: Start by drawing a horizontal line to help ensure symmetry between the apple’s halves. Extend this line to accommodate the visible length of the stick.
- Outline the Apple: Sketch the outer shape of the apple as a circle, positioning it near the top of the line to leave room for the stick.
Step 2: Define the Top
- Flat Surface: When an apple is dipped in its coating, it typically forms a flat surface on the bottom. In this upside-down view, this flat part becomes the top.
- Guide Lines: Add another construction line to visualize this area, drawing an oval to represent the flat top surface.
Step 3: Draw the Apple
- Refine the Shape: Using the guidelines, draw the apple’s contour. The shape should be slightly rounded at the top, tapering towards the bottom.
- Erase Extra Lines: Remove any unnecessary construction lines, leaving only those needed for further detailing.
Step 4: Draw the Stick
- Add the Stick: Insert a stick into the apple top, using the central line as a guide. The stick should appear slightly off-center to add realism.
- Full Length Reference: While the example shows a partial view, envision the stick’s full length for context.
Step 5: Draw the Top of the Wrapper
- Wrap Folds: Candy apples are often wrapped in clear plastic. Draw the folds at the top of the wrapper, varying the shapes to create a natural, crumpled appearance.
- Tied Section: Narrow the wrap near the base to indicate where it is tied.
Step 6: Draw the Bottom of the Wrapper & Folds
- Complete the Wrap: Illustrate the bottom part of the wrapper, adding multiple folds to mimic real plastic texture.
- Add Final Touches: Lightly outline these folds with a pencil for a delicate appearance.
Step 7: Add Color
- Color the Apple: Use red for the apple and tie, light brown for the stick, and light grey for the wrapper.
- Create Highlights: Leave areas uncolored to serve as highlights, enhancing the glossy effect. Position these highlights along the apple’s sides and top.
- Digital vs. Traditional: If working digitally, add highlights post-coloring. With traditional media, sketch highlight areas first to avoid coloring over them.
Step 8: Apply Shading & Complete Candy Apple Drawing
- Shading the Apple: Assume a light source from the top left; shadows will fall on the bottom right. Add small shadows beneath the flat top and along the apple’s sides.
- Detailing the Stick: Shade the top part of the stick where it meets the apple, adding depth.
- Deepen Shadows: Enhance the apple’s depth by darkening areas where the apple curves inward or where the light is least likely to reach.
Conclusion
Candy apples are a delightful addition to any anime or manga scene, especially in stories with festive settings. This tutorial provides a thorough approach to capturing their glossy, appealing nature in your artwork. Drawing such treats can be time-consuming, but with practice, you can master the art of depicting these iconic sweets realistically and attractively. Enjoy the process, and don’t be discouraged if it takes time to perfect your drawing.
This tutorial shows you an easy way to draw one while at the same time following good drawing habits and maintaining the right style for anime and manga.
Thanks for Visiting Our Website – Easy Anime Drawings


brand modafinil 200mg buy modafinil 100mg sale provigil 200mg cheap order modafinil online modafinil where to buy provigil 200mg generic purchase provigil online cheap